Have you ever had a craving for mouthwatering, tender pulled pork? Well, it just so happens that you own an electric smoker – the perfect tool for creating delectable smoked meats. Coincidence? We think not!
With your trusty electric smoker and a few key techniques, you can achieve succulent pulled pork right in the comfort of your own backyard. In this article, we will guide you through the process of preparing and smoking the perfect cut of meat to create irresistible pulled pork. You’ll learn how to choose the right cut of meat, prepare it for smoking, and create a flavorful dry rub that will enhance its natural flavors. We’ll also show you how to properly preheat and set up your electric smoker for optimal results.
But why stop there? We’ll even teach you how to add a delicious BBQ sauce for an extra burst of flavor. And once your masterpiece is complete, we’ll share tips on serving and storing leftover pulled pork.
So get ready to embark on a culinary adventure as we dive into the world of pulled pork in an electric smoker. Your taste buds won’t know what hit them!
Choosing the Right Cut of Meat
You’ll want to make sure you choose a nice, fatty cut of pork shoulder for your delicious pulled pork in the electric smoker. The fat content is crucial because it helps keep the meat moist and adds flavor during the long smoking process.
Look for a piece that has good marbling throughout, as this will ensure a tender and juicy end result.
When it comes to choosing the right cut of meat, there are a few options available. One popular choice is bone-in pork shoulder, also known as Boston butt. This cut is well-marbled and has enough fat to keep the meat succulent throughout smoking.
Another option is boneless pork shoulder, which is leaner but still flavorful when cooked low and slow.
Different smoking techniques can also affect your choice of cut. If you prefer a shorter cooking time, consider using a smaller cut like pork loin or tenderloin. These cuts are leaner and cook faster than shoulder cuts but may require extra care to prevent drying out.
Ultimately, the key to choosing the right cut of meat for pulled pork in an electric smoker is finding one with enough fat content to stay moist and flavorful during smoking. Whether you opt for bone-in or boneless shoulder or try something different like loin or tenderloin, make sure to select a high-quality piece that will result in mouthwatering pulled pork every time.
Preparing the Meat for Smoking
To get your meat ready for smoking, it’s important to properly season and marinate it. This step is crucial in ensuring that your pulled pork turns out flavorful and tender.

Here are four key things you should do to prepare the meat:
Marinating the meat for added flavor: Choose a marinade that complements the taste of pork, such as a combination of apple cider vinegar, brown sugar, garlic powder, and paprika. Place the meat in a resealable plastic bag or container and pour the marinade over it. Allow it to marinate in the refrigerator for at least 4 hours or overnight.
Using a meat injector for enhanced moisture retention: Injecting the pork with a liquid solution helps retain its moisture during the long smoking process. Create a mixture of apple juice, Worcestershire sauce, salt, and pepper, then use a meat injector to distribute it evenly throughout the meat.
Dry brining overnight: Before smoking, sprinkle kosher salt all over the surface of the meat and let it sit uncovered in the refrigerator overnight. This technique helps to draw out excess moisture while also enhancing flavor by allowing salt to penetrate deep into the muscle fibers.
Patting dry before smoking: Just before placing your marinated and dry-brined pork into your electric smoker, make sure to pat it dry with paper towels. Removing excess moisture will promote better smoke absorption and help achieve that sought-after crispy bark on your pulled pork.
By following these steps, you’ll be well on your way to preparing perfectly seasoned and mouthwatering pulled pork in your electric smoker!
Creating a Flavorful Dry Rub
Creating a flavorful dry rub is like sprinkling magic dust over your meat, infusing it with a burst of aromatic spices and herbs. It’s the secret ingredient that takes your pulled pork to the next level of deliciousness. When preparing your dry rub, you have the opportunity to experiment with different flavor profiles and marinating techniques.
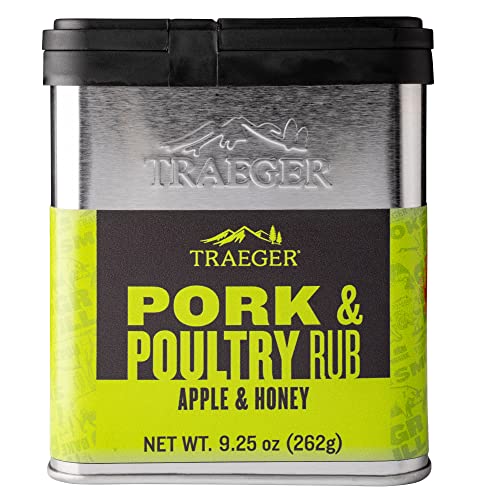
To create a truly flavorful dry rub, start with a base of salt and sugar. These two ingredients not only enhance the natural flavors of the meat but also help to tenderize it during the smoking process. From there, let your creativity run wild by adding spices and herbs that complement the pork. A classic combination includes garlic powder, paprika, cumin, black pepper, and chili powder for a smoky and slightly spicy kick.
However, don’t be afraid to think outside the box when it comes to alternative dry rub options. Consider incorporating ingredients such as coffee grounds for added richness or cocoa powder for a touch of sweetness. You can even try experimenting with different types of sugars like brown sugar or maple syrup for unique flavor profiles.
Remember that creating a flavorful dry rub is all about finding what you love and making it your own. So go ahead, sprinkle that magic dust over your pork and get ready for an explosion of taste in every bite!
| Spice/Herb | Flavor |
|---|---|
| Garlic Powder | Savory |
| Paprika | Smoky |
| Cumin | Earthy |
| Black Pepper | Spicy |
Note: This is just one example table; feel free to customize it based on your personal preference!
Applying the Dry Rub to the Meat
Get ready to elevate your meat to new heights by generously massaging the tantalizing dry rub onto every inch, allowing the flavors to mingle and dance on your taste buds. Applying an even coating of the dry rub is crucial for creating a delicious and flavorful pulled pork in your electric smoker.
To begin, make sure you’ve prepared enough dry rub to cover the entire piece of meat. The key is to use a generous amount so that every bite is bursting with flavor. Once you have your dry rub ready, start by patting the meat dry with paper towels to ensure it adheres properly.

Now, take a handful of the dry rub and sprinkle it evenly over one side of the meat. Use your hands to gently massage the rub into the surface, making sure it covers every nook and cranny. Flip the meat over and repeat this process on the other side.
As you apply the dry rub, remember that marinating plays an important role in enhancing both flavor and tenderness. The spices in the rub will penetrate deep into the meat during this marinating process, infusing it with rich flavors.
When you’re done applying the dry rub, let it sit for at least 30 minutes or up to overnight in the refrigerator before smoking. This gives time for all those amazing flavors to meld together and create a truly mouthwatering experience.
So go ahead, give your pulled pork a flavor makeover by expertly applying this tantalizing dry rub!
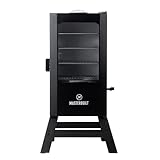
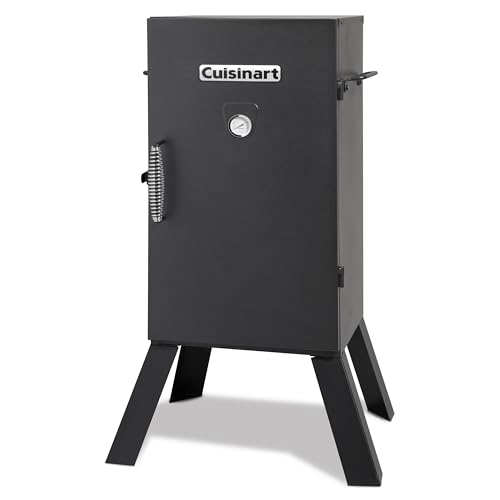
Preheating and Setting Up the Electric Smoker
Before diving into the mouthwatering process of applying the dry rub, it’s important to preheat and set up your trusty electric smoker to ensure optimal cooking conditions.
Preheating your electric smoker is crucial because it allows the temperature inside to stabilize before you start smoking your pulled pork. This ensures that your meat cooks evenly and retains its delicious flavor.
To begin, plug in your electric smoker and turn it on. Most electric smokers have a power button or dial that you can use to start the heating process. Make sure the lid is closed during this step to trap the heat inside.
Next, set your desired temperature using the control panel or knob on your electric smoker. It’s recommended to preheat your smoker to around 225°F (107°C) for pulled pork. This low and slow cooking method will result in tender and juicy meat.
As you wait for the smoker to reach the desired temperature, take note of any fluctuations in heat. Troubleshooting temperature fluctuations can be done by ensuring that all vents are open and unobstructed, as proper airflow is essential for maintaining consistent heat levels.
Once your electric smoker has reached the desired temperature and stabilized, you’re ready to move on to applying the dry rub onto your succulent piece of pork. But first, make sure you have all your ingredients prepared and ready for seasoning!
Incorporating these preheating techniques into your smoking routine will guarantee a successful cook every time. So don’t skip this important step – preheat and set up your electric smoker for optimal pulled pork perfection!
Adding Wood Chips for Smoke Flavor
Once you’ve preheated and set up your trusty smoker, it’s time to infuse your succulent piece of pork with mouthwatering smoke flavor by adding wood chips. This step is crucial in achieving that authentic, smoky taste that’ll make your pulled pork irresistible.
Here’s how you do it:
Soak wood chips: Before adding the wood chips to the smoker, soak ’em in water for at least 30 minutes. This helps prevent ’em from burning too quickly and creates a steady release of smoke throughout the cooking process.
Types of wood chips to use: The type of wood you choose will greatly influence the flavor profile of your pulled pork. For a classic smoky taste, hickory or mesquite chips are excellent choices. If you prefer a milder flavor, apple or cherry wood chips work well. Experiment with different woods to find your perfect combination.
Place the soaked wood chips directly onto the hot coals or into the designated chip tray of your electric smoker.
Close the smoker lid immediately after adding the wood chips to ensure maximum smoke retention.
As the fragrant smoke envelops your juicy pork, it imparts a rich and complex flavor that’ll have everyone’s mouths watering in anticipation. So go ahead, add those soaked wood chips, and let ’em work their magic on your pulled pork masterpiece!
Placing the Meat in the Smoker
When you’re ready to start cooking, make sure to carefully place your succulent piece of meat in the smoker for optimal flavor infusion. This step is crucial in achieving that mouthwatering pulled pork you’ve been craving.
Before placing the meat, it’s important to prepare it by applying your desired seasoning techniques. Whether it’s a dry rub or a marinade, be generous with your seasonings as they’ll enhance the taste and texture of the final product.
Once your meat is well-seasoned, gently place it on the smoker rack, making sure it’s evenly spread out. This allows for even cooking and ensures all sides of the meat are exposed to the delicious smoky flavors. Remember to leave some space between each piece so that smoke can circulate freely around them.
Now comes the part where patience pays off. The smoking time will vary depending on factors such as the size of the meat and your preferred level of tenderness. On average, expect anywhere from 1 to 2 hours per pound of meat at a temperature of around 225-250°F (107-121°C).
Throughout this time, resist any temptation to open the smoker lid too often as this can cause heat loss and prolong cooking time.
With your meat securely placed in the smoker and smoking away at an ideal temperature, all that’s left to do is sit back and let those enticing aromas waft through your backyard.
Soon enough, you’ll be rewarded with tender pulled pork that melts in your mouth with every bite.
Monitoring and Maintaining the Temperature
While your succulent piece of meat is in the smoker, it’s crucial to diligently monitor and maintain the temperature for optimal cooking results. Maintaining temperature control ensures that the pork cooks evenly and achieves that melt-in-your-mouth tenderness. One effective way to do this is by using a temperature probe.

- 490ft Stable Signal Connection and Hands Free Monitor: Smoker thermometer with a professional remote signal up to 490 feet, you can watch the game or connect with your family, pets or guests while the remote meat thermometer for grill grilling watches your meat. After rigorous testing, our wireless grill thermometer 's signal is strong and stable, reaching 2 times farther than a regular connection, 4 times more than Bluetooth
- Professional Feature - Sturdy Construction and User-friendly Interface: The cooking thermometer adopt TPE and plastic integral forming technology - anti-skid and more sturdy. Better than some other digital meat food thermometers wrapped with rubber sleeve. The buttons on the left are for meat and taste setting, the buttons on the right are for timer setting, make the grill thermomter for inside grill very straightforward to use
- Monitoring Food and High Low Ambient Temp Range Simultaneously: Meat smoking thermometer not only allows you to set your own cooking temperatures, but also can set HI LOW temp range for your grill or smoker to know when to add more fuel! oven safe meat thermometer will flash and beep to remind you if the temperature ever goes out your set range
- IPX7 Waterproof Probe with Step-down Tip Design: BBQ meat thermometer for cooking has 3 probes which are built to IPX7 standard with non-slip design, easier to plug in or pull out. Heat resistant material help to prolong service life. 2 food temp probes / digital candy thermometer with step-down tip design to get temperature more precisely and quickly - Instant Read within 1-3s
- USDA Preset Temperature Settings and Built in Timer: Oven thermometer for electric oven with preset temperatures for 8 types of meat and their various doneness levels recommended by USDA; All of the preset temps can be reset to your desired tastes, it's a professional digital meat thermometer for grill / wireless thermometer for smoking
A temperature probe is an essential tool that allows you to accurately measure the internal temperature of the meat throughout the smoking process. This helps you gauge when it’s done and prevents overcooking or undercooking. Simply insert the probe into the thickest part of the pork, making sure not to touch any bones as they can affect accuracy.
Now, let’s talk about evoking emotion through a 2 column and 3 row table:
| Emotion | Description |
|---|---|
| Excitement | The anticipation builds as you see smoke billowing from your smoker, knowing delicious pulled pork awaits. |
| Satisfaction | With each passing hour, you feel a sense of accomplishment as your meat slowly transforms into tender perfection. |
| Confidence | As you monitor and adjust the temperature with precision, you gain confidence in your ability to create mouthwatering pulled pork every time. |
By maintaining temperature control using a reliable temperature probe and evoking emotions like excitement, satisfaction, and confidence, you’ll be well on your way to achieving pulled pork nirvana in your electric smoker. So keep an eye on that thermometer and get ready for a flavor-packed adventure!
Basting and Spritzing for Moisture
To enhance the succulence and flavor of your smoked masterpiece, don’t forget the importance of basting and spritzing for added moisture. Basting techniques are crucial when it comes to achieving that juicy, melt-in-your-mouth pulled pork. As the meat slowly cooks in the electric smoker, it can dry out if it’s not properly attended to. That’s where basting steps in – by regularly brushing or pouring flavorful liquids onto the pork, you ensure a moist and tender end result.

There are various basting techniques you can employ while smoking your pork. One popular method is using a mop sauce, which consists of a mixture of spices, vinegar, and other ingredients that add depth to the flavor profile. Applying this sauce with a brush every hour or so will keep the pork moist and infuse it with delicious flavors.
Another technique to consider is spritzing, which involves using a spray bottle filled with apple juice, cider vinegar, or even beer to mist the meat during smoking. The benefits of spritzing go beyond just adding moisture. It helps create an attractive bark on the surface while keeping the meat from drying out too quickly.
By incorporating these basting techniques and regular spritzing into your smoking process, you’ll be rewarded with mouthwatering pulled pork that’s bursting with flavor and tenderness. So don’t overlook this crucial step – take care of your smoked masterpiece by giving it some extra love through basting and spritzing!
Wrapping the Meat for Tenderization
Don’t forget to wrap the meat for ultimate tenderness and flavor. Wrapping the pulled pork in foil or butcher paper is a crucial step in the tenderization process.
By wrapping the meat, you create a sealed environment that traps moisture and heat, allowing the collagen in the pork to break down slowly and evenly. This results in incredibly tender and succulent meat that practically melts in your mouth.
There are several tenderization techniques, but wrapping is one of the most effective methods. The benefits of wrapping go beyond just tenderness. When you wrap the meat, you not only retain moisture but also enhance the flavors as they infuse into every fiber of the pork. The juices from spices and marinades are locked in, intensifying their taste.
To achieve optimal results, make sure to tightly wrap the pulled pork so that no steam or moisture can escape during cooking. Foil is great for sealing in all those delicious juices, while butcher paper allows for some airflow while still maintaining moisture levels.
So remember, when smoking pulled pork in an electric smoker, don’t skip this essential step of wrapping. Your tastebuds will thank you for it!
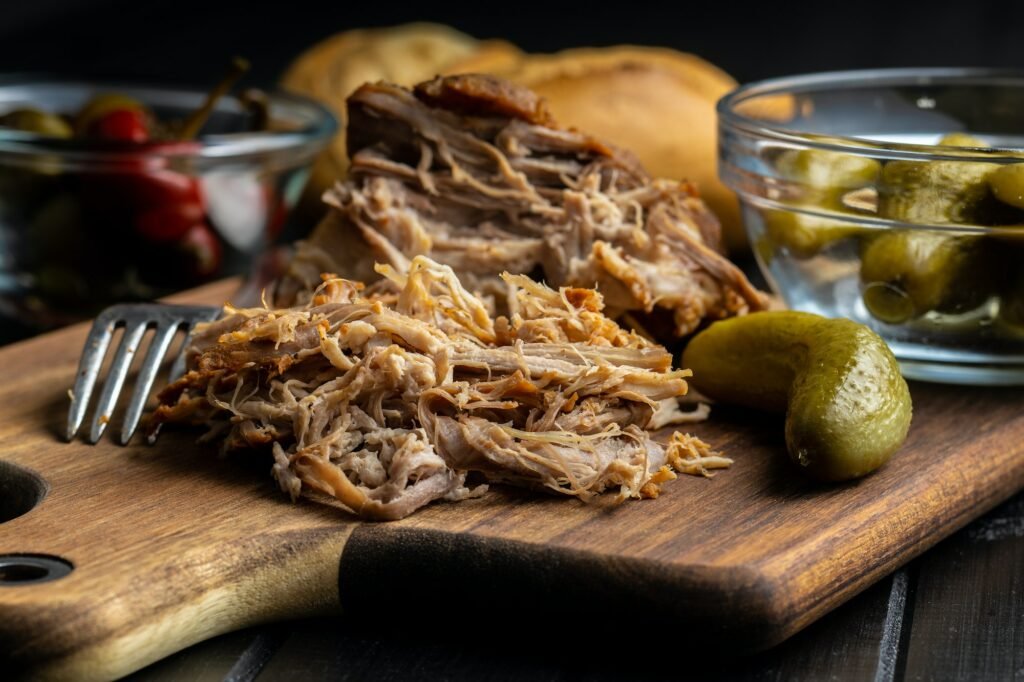
Resting and Shredding the Pulled Pork
After the meat has been wrapped and allowed to rest, it’s time to unleash your inner chef and shred that tender, melt-in-your-mouth goodness. The resting time is crucial as it allows the juices to redistribute throughout the meat, resulting in a more flavorful and moist pulled pork. Patience is key here, so resist the temptation to dive right in!

- BEAR PAWS - Heat resistant claws (up to 475 degrees) that are perfect for pulling pork, shredding chicken, lifting turkeys and briskets, tossing salads and more
- COTTON LINED SILICONE GLOVES - Heat resistant (up to 425 degrees) and waterproof gloves that are perfect for the grill, smoker and mea
- MEAT INJECTOR - Heavy-duty, stainless steel meat injector that is durable and comes with two needle options
- PORK KIT or TURKEY KIT - These BBQ tools will help you prepare the perfect pork and the tantalizing turkey
- HIGH QUALITY - All three products are well-made and manufactured by trusted BBQ brands
To ensure maximum tenderness, use a pulling technique when shredding the pork. Start by removing any excess fat or connective tissue with a sharp knife. Then, using a pair of forks or meat claws, gently pull apart the meat into thin shreds. This method helps to break down any remaining tough fibers and ensures each bite is succulent and easy to chew.
Now let’s delve into how you can enjoy this mouthwatering pulled pork experience even more with a handy table:
| Tips for Resting Pulled Pork | Tips for Shredding Pulled Pork |
|---|---|
| – Allow at least 30 minutes of resting time after unwrapping the meat. | – Remove excess fat or connective tissue before shredding. |
| – Keep the pulled pork covered during resting to retain heat and moisture. | – Use forks or meat claws to easily pull apart the meat into thin shreds. |
| – Avoid cutting into the meat immediately after unwrapping as it may cause moisture loss. | – Pull in small sections for better control and consistency. |
| – Use this time to prepare your favorite BBQ sauce or other accompaniments. | – Enjoy every bite of your perfectly shredded pulled pork! |
With these tips in mind, you’ll be able to savor every delicious morsel of your electric smoker pulled pork creation!
Adding BBQ Sauce for Extra Flavor
Now that you’ve rested and shredded your pulled pork, it’s time to take it to the next level by adding some mouthwatering BBQ sauce. This step is crucial in enhancing the flavor and making your pulled pork truly irresistible.
When it comes to grilling techniques, you can apply the BBQ sauce in a few different ways. Some people prefer to brush the sauce directly onto the meat before serving, while others like to mix it in with the shredded pork for an even distribution of flavor. Whichever method you choose, make sure to coat every morsel of pork with this homemade BBQ sauce.

A homemade BBQ sauce adds a personal touch and allows you to control the flavors according to your preferences. You can experiment with different combinations of ingredients like ketchup, brown sugar, vinegar, Worcestershire sauce, garlic powder, smoked paprika, and cayenne pepper for a sweet and tangy or spicy kick.
As you slather on that rich and smoky BBQ sauce onto your succulent pulled pork, envision how each bite will burst with a harmonious blend of savory and sweet flavors. The slow-cooked tenderness of the meat combined with the sticky goodness of the sauce will leave everyone craving for more.
So go ahead and add that final touch to your masterpiece – let the flavors mingle together as they grill away on low heat for a few more minutes. Your taste buds are about to embark on an unforgettable journey through tender perfection enhanced by a tantalizing homemade BBQ sauce.
Serving and Enjoying the Pulled Pork
To fully savor the tantalizing flavors of your mouthwatering creation, imagine yourself eagerly piling a generous portion of succulent pulled pork onto a soft and fluffy bun. The moment you take that first bite, your taste buds will be transported to BBQ heaven.
But don’t stop there! Here are some serving suggestions and pairing ideas to enhance your dining experience:
Coleslaw: Add a refreshing crunch and tanginess by topping your pulled pork sandwich with creamy coleslaw. The combination of textures and flavors will create a perfect balance.
Pickles: For an extra kick, layer some pickles on top of the pulled pork. The acidity and brininess will cut through the richness of the meat, adding complexity to each bite.
Baked Beans: Serve alongside a hearty helping of baked beans for a classic BBQ side dish that complements the smoky flavors of the pulled pork beautifully.
Cornbread: Complete your meal with a slice of warm cornbread. Its slightly sweet taste and crumbly texture make it an ideal companion for the rich and tender pulled pork.
By incorporating these serving suggestions and pairings into your culinary adventure, you’ll elevate the enjoyment of every bite while creating an unforgettable dining experience for yourself and those lucky enough to join you at the table.
Storing and Reheating Leftover Pulled Pork
When storing leftover pulled pork, make sure to transfer it into an airtight container or wrap it tightly in plastic wrap to maintain its freshness and prevent any moisture from seeping in. For example, if you have some remaining pulled pork from last night’s BBQ party, place it in a sealed container before refrigerating it for future use.
To ensure the best quality when reheating your leftover pulled pork, there are several techniques you can try. One option is to reheat it in the oven at a low temperature (around 250°F) for about 15-20 minutes. This will help retain its juicy tenderness without drying it out. Another method is using a microwave, but be cautious as this can lead to uneven heating and potentially dry out the meat. To avoid this, add a splash of water or barbecue sauce before microwaving and cover the dish with a microwave-safe lid or microwave-safe plastic wrap.
Now let’s talk about getting creative with your leftover pulled pork! There are endless possibilities for repurposing this delicious meat. You can use it as a topping for nachos or pizza, stuff it into tacos or sandwiches, or even incorporate it into pasta dishes like macaroni and cheese. The smoky flavor of the pulled pork adds depth and richness to any recipe.
Here’s an attention-grabbing table to inspire you:
| Reheating Technique | Description |
|---|---|
| Oven | Low temperature (250°F) for 15-20 minutes |
| Microwave | Add water/sauce, cover with lid/wrap |
| Stovetop | Heat gently over medium-low heat |
With these reheating techniques and creative leftovers ideas, you can enjoy your mouthwatering pulled pork even after the initial feast!
Troubleshooting Common Issues
If you’re experiencing any issues while cooking your delicious pulled pork, let’s troubleshoot some common problems together. Don’t worry, we’ve got you covered! Here are a few tips to help you overcome any hurdles and ensure your pulled pork turns out perfect every time.
- Troubleshooting equipment: One common problem is when the temperature in your electric smoker fluctuates too much. This can result in unevenly cooked meat or even undercooked portions. To fix this, make sure that the smoker’s temperature probe is properly calibrated and positioned correctly. You may also want to consider investing in an external digital thermometer for more accurate readings.
Additionally, check that the heating element is functioning properly and clean any built-up residue or ash from previous cooks.
- Adjusting cooking times: Another issue you might encounter is when your pulled pork takes longer to cook than expected. This can be frustrating, especially if you’re hungry and eagerly waiting for that juicy goodness. In this case, try increasing the cooking temperature slightly or wrapping the meat in foil to speed up the process without sacrificing tenderness.
Also, keep in mind that different cuts of pork may require varying cooking times, so be flexible and adjust accordingly.
By troubleshooting these common issues with your equipment and adjusting cooking times as needed, you’ll be well on your way to mastering the art of smoking delicious pulled pork every time. So don’t get discouraged – just keep experimenting and refining your technique until you achieve barbecue perfection!
Frequently Asked Questions
How long should I rest the pulled pork before shredding it?
Resting time is crucial for achieving pulled pork tenderness. Take a moment to appreciate the anticipation as the meat rests, its flavors melding together. Around 30 minutes should suffice, but don’t rush perfection!
Can I use a different type of wood chips for smoke flavor?
Yes, you can definitely use different types of wood chips for smoking to give your pulled pork alternative flavors. Experiment with hickory, applewood, or mesquite chips to add a unique smoky taste to your dish.
How often should I baste or spritz the meat during the smoking process?
To achieve a crispy bark on your pulled pork, resist the temptation to constantly baste or spritz. Think of it like applying too much makeup – you’ll end up with a cakey mess. Instead, let the smoker work its magic and focus on preventing the meat from drying out by maintaining a consistent temperature and using a water pan or spritzing sparingly. Trust me, your pork will be tender, juicy, and oh so flavorful!
What is the best way to store leftover pulled pork?
The best ways to store leftover pulled pork include refrigerating it in an airtight container or freezing it in freezer-safe bags. This helps maintain its flavor and texture until you’re ready to enjoy it again.
What are some common issues that may occur while smoking pulled pork in an electric smoker and how can I troubleshoot them?
Like a skilled mechanic diagnosing a car, troubleshooting common issues that arise while smoking pulled pork in an electric smoker requires patience and know-how. From temperature fluctuations to smoke production problems, these troubleshooting techniques will keep you grilling like a pro.
Conclusion
Now that you’ve mastered the art of smoking pulled pork in an electric smoker, get ready to indulge in a mouthwatering feast. As you take your first bite, the tender and succulent meat melts in your mouth, releasing a smoky aroma that transports you straight to barbecue heaven.
The perfectly balanced flavors of the dry rub and BBQ sauce dance on your taste buds, leaving you craving for more. With each bite, you savor the juicy goodness and can’t help but feel like a true pitmaster.
So grab a plate and dig in – it’s time to enjoy your well-deserved masterpiece!