Are you looking to smoke cheese in an electric smoker but don’t know where to start? Look no further! In this comprehensive guide, we’ll take you step-by-step through the process of smoking cheese in an electric smoker to achieve a delicious, smoky flavor. Of course, you can also smoke many other kinds of food in a smoker but, today, we will be concentrating on yummy cheese!
Electric smokers are a great option for those who want to smoke cheese but don’t have the experience or equipment for traditional smoking methods. With electric smokers, you can easily control the temperature and smoke level, resulting in consistently delicious cheese every time.
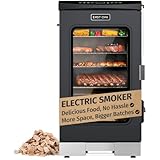
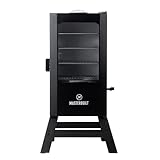
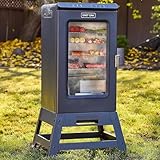
Before we get started, let’s discuss the equipment you’ll need to smoke cheese in an electric smoker. Here’s a list of what you’ll need:
- Electric smoker
- Cheese (cheddar, gouda, and mozzarella are great options)
- Wood chips (applewood, hickory, and pecan are popular choices)
- Smoker thermometer
- Foil pan or aluminum foil
- Cheese cloth
Now that we have our equipment ready, let’s move on to the steps to smoke cheese in an electric smoker.
Table of Contents
ToggleStep 1: Preheat the smoker
Before you start smoking your cheese, you’ll need to preheat your electric smoker to the desired temperature. For smoking cheese, we recommend a temperature of 70-80°F. Once the smoker is preheated, place a handful of wood chips on the heating element and wait until they start to smoke.
Step 2: Prepare the cheese
While the smoker is preheating, prepare your cheese for smoking. Cut the cheese into smaller pieces or blocks that will fit on the smoker racks. If you’re using cheese that has a wax coating, remove it before smoking.
Step 3: Place the cheese in the smoker
Once the smoker is preheated and the wood chips are smoking, place the cheese on the smoker racks. Be sure to leave space between the cheese to allow for adequate smoke circulation. If you’re using a foil pan, place the cheese in the pan and cover it with foil.
Step 4: Monitor the temperature
To ensure that the cheese is smoking properly, use a smoker thermometer to monitor the temperature inside the smoker. Keep the temperature at 70-80°F for about an hour.
Step 5: Check the cheese
After an hour of smoking, check the cheese to see if it has developed the desired smoky flavor. If it hasn’t, continue smoking for another 30 minutes to an hour.
Step 6: Remove the cheese from the smoker
Once the cheese has developed the desired smoky flavor, remove it from the smoker and let it cool for about 30 minutes.
Step 7: Wrap the cheese
Wrap the cheese in cheese cloth to allow it to breathe but still protect it from air exposure. Store the cheese in the fridge for at least 24 hours before serving to allow the smoky flavor to develop fully.
In conclusion, smoking cheese in an electric smoker is a simple process that can result in delicious, flavorful cheese. With the right equipment and a little bit of patience, you can enjoy homemade smoked cheese whenever you want. So, go ahead and give it a try – your taste buds will thank you!