Grilling beef ribs can feel like orchestrating a small fireworks show, and we’re about to walk through the steps that keep the smoke, flavor, and patience all in sync. We’ll start with a well‑marbled rack, trim the excess, slap on a mustard binder, and dust it with a spice mix that’s both simple and surprisingly complex. Then we set up a two‑zone grill, aim for that sweet spot of 250‑300°F, and let the meat cook low and slow—first unwrapped, then wrapped in broth, and finally glazed. I think you’ll find the timing a bit fuzzy, but that’s part of the charm; the key is to watch, smell, and trust the process. Ready to see how it all comes together?
Choose the Right Cut for Grilled Ribs and Trim
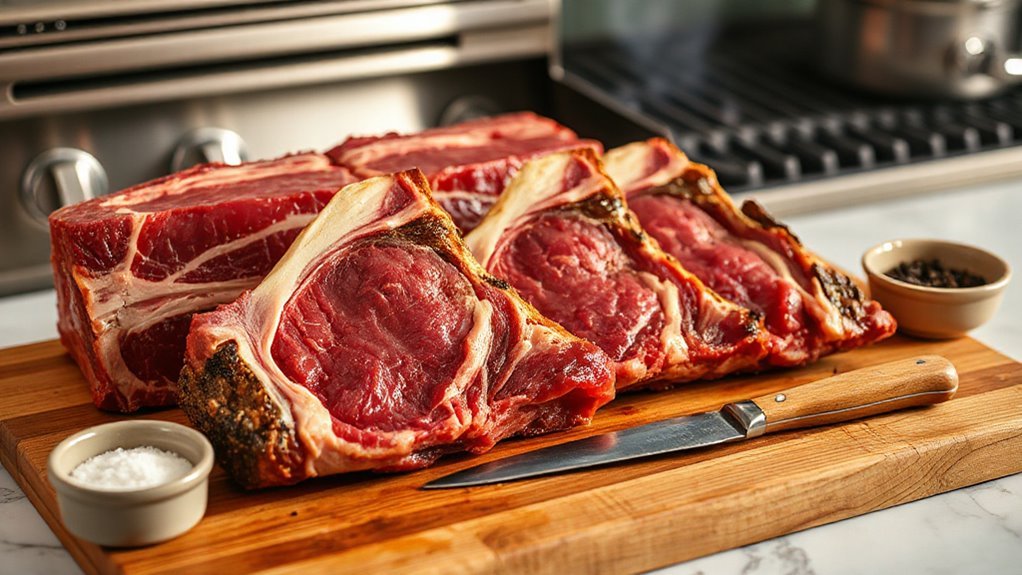
Choosing the right cut for grilled ribs can feel a bit like a puzzle, can? We start with beef selection, looking for a well‑marbled short rib plate or a full rack that still has that thick, connective‑tissue layer. It’s not just about size; the grain and fat distribution matter, especially when we plan to slow‑cook.
Once we’ve the piece, trim techniques come into play. We pull away the membrane with a spoon handle—yeah, that little trick we learned from a friend—and trim excess fat from both the bone side and the meat side. Sometimes we over‑trim, maybe a bit too cautious, but it’s better than a greasy bite. A quick rinse with vinegar can help, though it’s optional. This prep sets the stage for flavor to actually stick later.
Whip Up a Mustard Binder and Spice Rub
Ever wonder why a simple layer of mustard can make all the difference before a spice rub? We spread a thin mustard binder on the ribs, letting its acidity lift the surface and help the rub cling. It’s not just flavor; it creates a tacky base so the spices don’t slide off.
Next we whisk together our spice rub: salt, pepper, beef seasoning, a pinch of allspice, thyme, oregano, maybe a dash of smoked paprika if we’re feeling adventurous. We taste, adjust, and then massage the mixture into the meat, letting it sit briefly. The mustard binder does its job, and the spice rub penetrates, promising a balanced crust. We’re ready for the grill.
Set Up a Two‑Zone Grill for Indirect Heat
When we first fire up the grill, we usually start by arranging the coals on one side and leaving the other side empty, creating that classic two‑zone setup for indirect heat. We light the charcoal, let it ash over, then push the glowing embers to the right. The left side stays cool, so the ribs can sit there without burning.
A couple techniques help us keep things steady: we place a water pan on the cool side to add moisture, and we use a grill thermometer to monitor the zone temperature. While the coals settle, we check the grates for any rust—quick grill maintenance prevents flare‑ups later.
Once the zones are set, we slide the ribs bone‑side up on the indirect side and let the low, even heat do its work.
Know the Temperature and Timing for Perfect Ribs
Now that our two‑zone grill is humming and the ribs are settled on the cool side, the real magic starts with the temperature curve and timing.
We aim for a steady 250‑300°F, which means the meat‑side stays low and slow while the bone side faces the heat.
If we let the grill drift higher, we risk a burnt exterior and a wrong topic of doneness—nothing like a peppered steak’s quick sear.
We usually cook the ribs 2.5–3 hours, then flip and add another 30‑60 minutes, watching the internal temp creep toward 175‑205°F.
It feels a bit like balancing an unrelated flavor profile; patience and a watchful eye keep things on track.
Apply the 3‑2‑1 Method: Unwrapped → Wrapped → Sauced
If we let the ribs sit unwrapped for the first three hours, they’ll soak up that smoky aroma while the meat stays tender—well, at least that’s what we’ve found, though I’m still not entirely convinced it’s the only way.
We keep the heat steady, flip once, and let the bark form.
Then we wrap tightly in foil, adding a splash of broth; this “2‑hour” stage locks in moisture and softens the connective tissue.
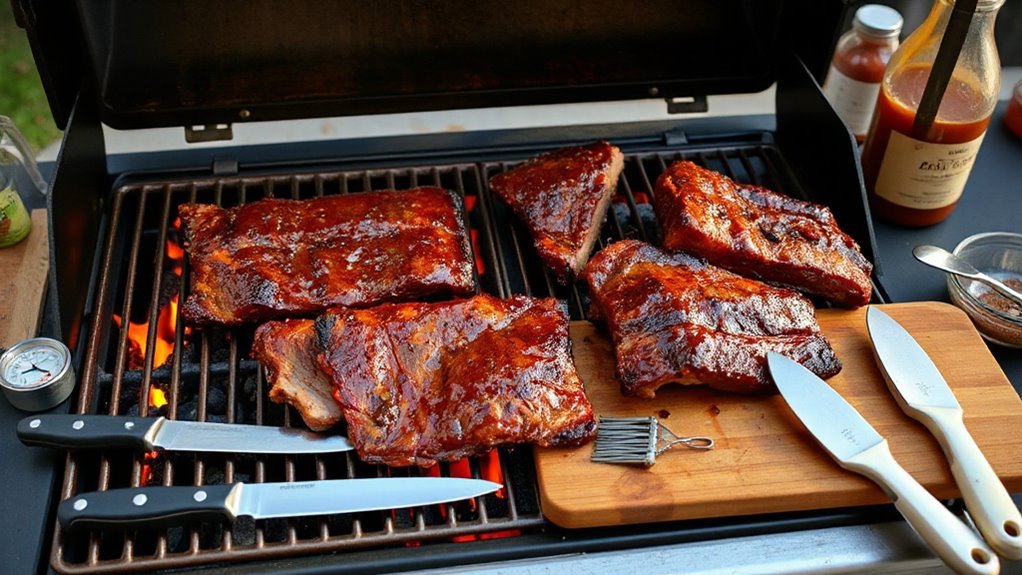
Finally we unwrap, crank the grill a bit higher, and brush on sauce.
We experiment with alternative sauces—maybe a mustard‑honey glaze or a vinegar‑based dip—to spark new story ideas for future meals.
The result is a tender, smoky rib with a glossy finish.
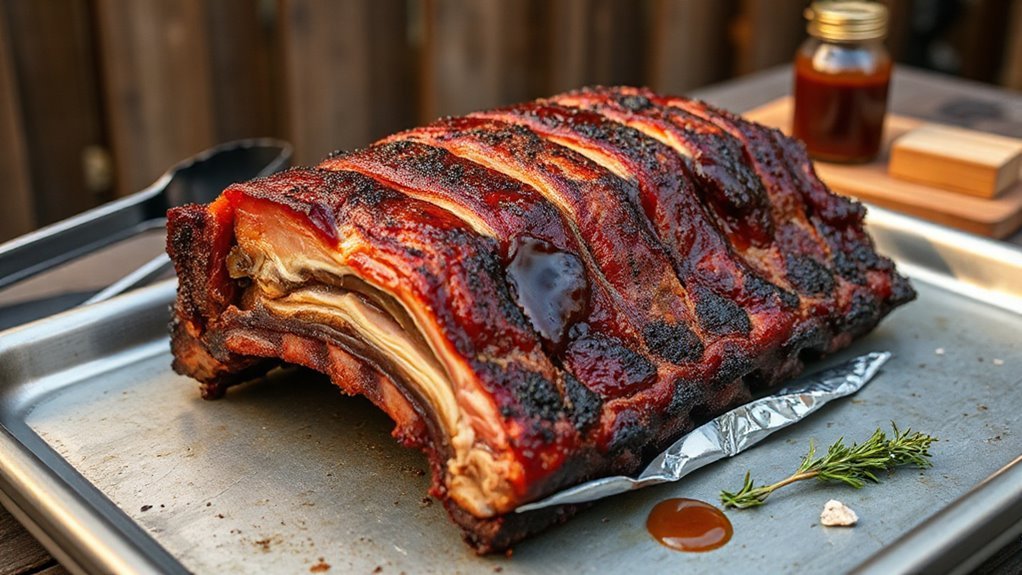
Sauce, Caramelize, and Rest the Grilled Ribs
Ever wonder why we linger over the sauce before the final grill? We’ve learned that a good glaze does more than add flavor; it creates that caramelized crust we crave. First we brush on a thin layer, then let the heat work—sometimes we flip, sometimes we just watch the sugars darken. If the sauce techniques feel too thin, we’ll thicken with a dash of honey or a splash of bourbon, just to keep things interesting. After the final char, we let the ribs sit. Resting strategies are simple: tent with foil, keep them warm, and give the juices a chance to redistribute. It may seem like a pause, but that brief rest makes every bite tender and juicy.
Frequently Asked Questions
Can I Use a Gas Grill Instead of Charcoal for the 3‑2‑1 Method?
We can use a gas grill for the 3‑2‑1 method, adjusting heat to mimic charcoal’s low‑and‑slow. It still delivers great beef rib reactions, and mastering these grilling techniques guarantees tender, flavorful results.
Should I Add Wood Chips to a Gas Grill for Smoke Flavor?
We’d suggest sprinkling wood chips on your gas grill for a subtle smoky whisper; they’ll infuse the ribs with gentle aromatics, delivering that coveted flavor without overwhelming the heat or texture.
What’s the Best Way to Keep Ribs Moist Without Wrapping?
We keep ribs moist by basting frequently with broth or butter, spraying apple juice, and cooking low‑and‑slow over indirect heat; this moisture retention also boosts rib tenderness while preserving flavor.
Do I Need to Pre‑Heat the Grill Before Placing the Ribs?
We’ll preheat the grill first, so the coals reach a steady 250‑300°F before you start handling meat. That guarantees consistent indirect heat, reduces sticking, and gives the ribs a solid, flavorful foundation.
Can I Substitute the Mustard Binder With Olive Oil?
We can swap the mustard binder for olive oil, but keep it thin so it adheres well; the oil will still help the rub stick and add a subtle richness without overpowering the flavor.