You might not realize that the grill’s heat can actually “cook” a halibut fillet from the inside out, not just sear the surface. We’ll walk through the steps, from getting the right temperature to the perfect butter‑herb finish, and we’ll sprinkle in a few tips that usually get missed. It’s not just about timing; it’s about watching those subtle color changes and feeling the flesh give a little under the tongs. If you’re curious how a simple flip can make all the difference, keep going.
Set Your Grill to the Perfect Heat
How do we get the grill just right for halibut? We start by preheating to a steady medium‑high, around 400°F, which gives us that sweet spot between sear and flare‑up. Lightly oiling the grates with a high smoke‑point oil is a small step that prevents sticking, and we usually do it with a brush—just enough, not a drench. If you have a charcoal grill, let the coals ash over, aiming for a consistent 525‑575°F for that quick, crisp char. Some of us prefer a gas grill set to 375°F for a gentler bake before the final sear. This “two word discussion idea 1” of temperature control and “two word discussion idea 2” of oiling creates a reliable foundation, even if we occasionally second‑guess the exact numbers.
Prepare the Halibut: Dry, Season, and Oil
Ever wondered why the simplest steps—drying, seasoning, and oiling—can make the biggest difference when grilling halibut? We start by patting each fillet with paper towels, using careful drying techniques to remove excess moisture; this helps the crust form and prevents steaming. Next, we sprinkle a balanced mix of salt, pepper, and maybe a hint of paprika for flavor depth. Finally, we choose an oil with a high smoke point—like grapeseed or avocado—to brush both sides, ensuring the fish stays moist and releases easily from the grill.
- Pat fillets dry, then let them rest briefly; the surface should feel almost powdery.
- Season generously, but don’t over‑do it; a little extra pepper can surprise you.
- Apply a thin, even layer of oil, remembering that oil choices affect both flavor and flare‑ups.
Brush Garlic‑Thyme Butter on Halibut Before First Flip
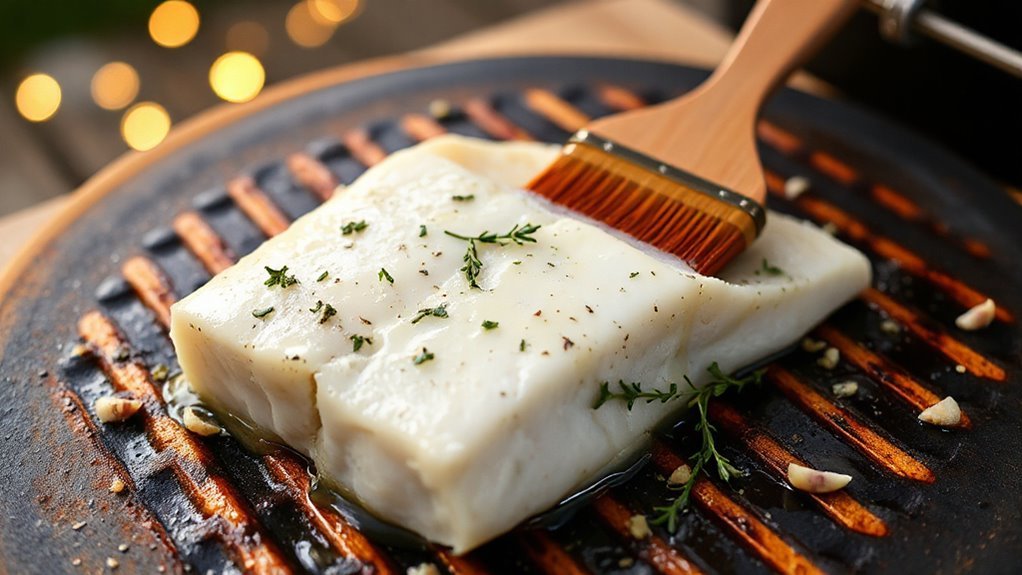
After we’ve patted the halibut dry, seasoned it, and brushed on a thin coat of oil, the next step is to add that buttery, herb‑infused finish before we flip the fish. We melt a generous knob of garlic butter in a small pan, letting the thyme aroma rise as it sizzles. Then we spoon the mixture over the flesh, spreading it evenly with a silicone brush. The butter should coat the surface without drowning it—just enough to create a glossy veil. As we watch the grill’s heat, we might wonder if a little extra thyme would heighten the scent; perhaps a pinch more would be fine. This layer will caramelize slightly, sealing in moisture and flavor before the first flip.
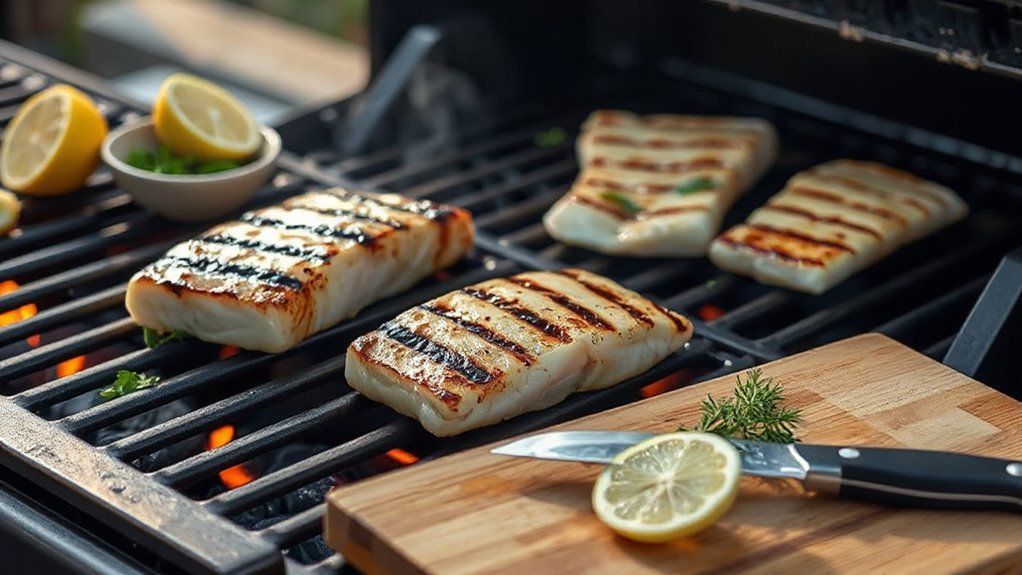
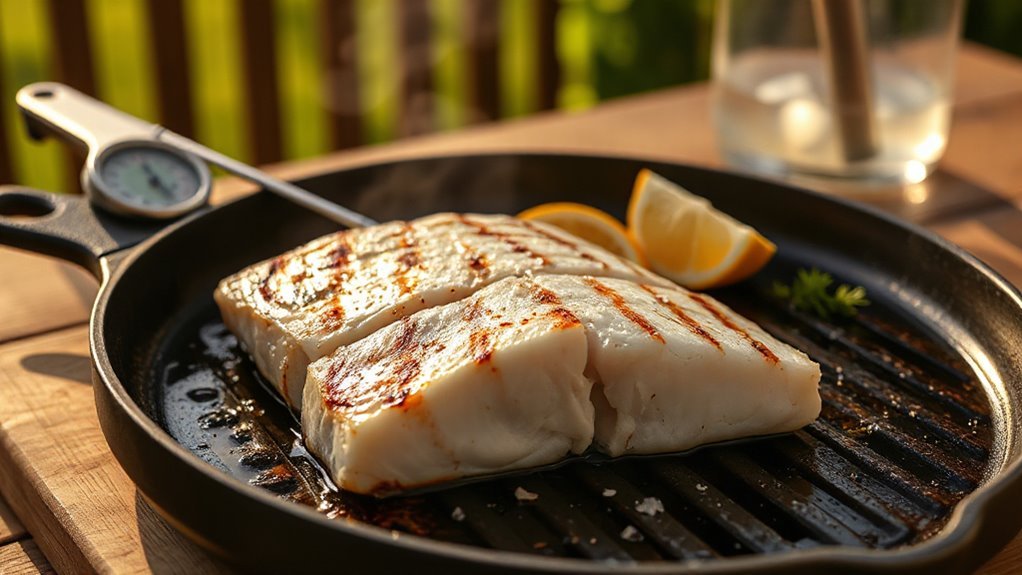
Grill the First Side: Timing and Char Marks
Do you ever wonder how long that first side should stay on the grill before the char marks appear? We usually let the halibut sit for about 2‑3 minutes, then we check the surface. The grill timing feels a bit like a guess, but the visual cue—those dark, slightly crisp edges—tells us we’re on track. If the heat’s a touch lower, we might add an extra minute; if it’s hotter, we pull it earlier to avoid over‑cooking. It’s a balance, really, between patience and intuition, and we’ve learned that a little patience pays off with perfect char marks.
- Close the lid and watch the sizzle.
- Count 2‑3 minutes, then lift a corner to inspect.
- Adjust timing if the marks are too light or too dark.
Flip and Finish: Monitor Doneness and Temperature
The moment we flip the halibut, the grill’s heat shifts from a quick sear to a more measured finish, and that’s when we really start watching the temperature. We keep a close eye on the internal reading, aiming for about 130°F if we like a moist, medium finish, but we’ll pull at 145°F for full flakiness. A quick probe in the thickest part tells us if the flesh is still translucent—perhaps a sign we should give it another minute.
We often compare this to an unrelated topic like baking bread, where you also watch the crust and interior. While we’re monitoring, we remember the cooking technique of closing the lid briefly; it traps heat, but we must avoid over‑cooking, because halibut dries fast. This balance feels like a dance, a little trial and error, but the result is worth the careful watch.
Rest and Serve With Lemon‑Caper Garnish
We pull the halibut off the grill just as the flesh turns opaque but still a little tender, then let it rest for a minute or two—otherwise the juices rush out and it ends up dry.
While it rests, we whisk together a quick lemon‑caper sauce, letting the bright acidity balance the buttery fish.
The sauce is simple, yet it adds a two word punch that feels sophisticated without being fussy.
- Toss fresh capers with lemon zest and a splash of olive oil.
- Drizzle the mixture over the rested fillet, letting it soak in.
- Finish with a sprinkle of chopped parsley for color and a hint of herbaceous aroma.
We taste, adjust salt, and serve immediately, knowing the rest period preserved moisture while the garnish delivers a two word contrast that elevates the dish.
Avoid Common Mistakes When Grilling Halibut

Ever wonder why a perfectly grilled halibut can still end up dry or flavorless? We’ve learned that a few common missteps can ruin the dish, even when we think we’re doing everything right. First, we often over‑oil the grill, assuming more means less sticking, but that creates flare‑ups and washes away seasoning. Second, we sometimes treat the fish like a steak, flipping too often or moving it around, which leads to uneven cooking and a soggy crust. Third, we ignore internal temperature, pulling it too early or too late—both result in a dry texture. We also get distracted by unrelated topic conversations, causing off topic misunderstandings that make us forget to monitor the heat. By staying focused, using a thermometer, and resisting the urge to over‑handle the fillet, we keep the halibut moist and flavorful.
Frequently Asked Questions
Can I Grill Frozen Halibut Directly?
We can’t grill frozen halibut directly; it risks uneven cooking and food safety. Use proper grilling techniques—thaw first, pat dry, then monitor temperature—to ensure safe, delicious results.
Should I Use a Cast‑Iron Skillet on the Grill?
We recommend using a cast‑iron skillet on the grill; its even heat and sturdy surface boost flavor while reinforcing grill safety. It steadies the fish, prevents sticking, and lets you monitor temperature effortlessly.
How Long Does a 1‑Inch Fillet Need to Rest?
We recommend letting a 1‑inch halibut fillet rest for three to five minutes after cooking; this short cooking rest lets juices redistribute, keeping the flesh moist and flavorful for the next bite.
Do I Need to Pre‑Sear the Butter on the Grill?
Think of it like a sunrise on the grill: we don’t pre‑sear butter; we brush it on just before cooking. Use butter pre‑sear sparingly, and follow our grill tips for perfect halibut.
Can I Add Wood Smoke for Extra Flavor?
We can add wood smoke for extra flavor, and it pairs nicely with the butter‑thyme glaze; just sprinkle a few chips on the coals, close the lid, and let the aromatic pairing enhance the halibut.